How to set Up a Workgroup or small Home network
How can I set Up a Workgroup?
One of the benefits of networking computers in your home or small-office network is that multiple computers can all use certain files, folders, and a printer. This multi-user capability is implemented in two steps:
- The owner of a computer makes files, folders, or a connected printer available to others on the network (a process called “sharing”).
- Others on the network then access the files, folders, or drives.
To facilitate this multi-user access, we recommend first setting up a workgroup and making all of the computers that are sharing or accessing shared resources members of the workgroup.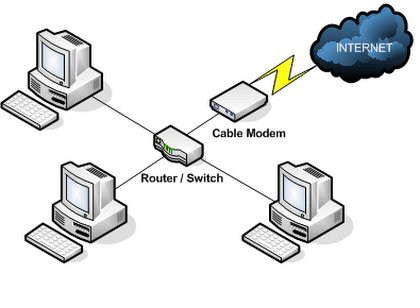
A workgroup is a grouping of computers that are connected to each other over a network. This grouping is handled within the Microsoft® Windows® operating system, where the members of the workgroup assume the same workgroup name (though each computer in a workgroup must have a unique computer name). Computers in a workgroup communicate directly with each other and do no
t require a server to manage network resources.
A workgroup might be created for use in a home or small office network, so that different computers can more easily share files, printers, and other network resources.
Once a workgroup has been created, it is visible in My Network Places (available from the desktop in Windows). The ability to see a whole workgroup simplifies the viewing and accessing of shared resources.
Note that while a workgroup is a grouping of computers that are connected to a network, it is not the same as a network. You can connect a computer to your network without making it a member of a specific workgroup. That same computer can also share its resources with and access the shared resources of computers in the other workgroup. However, the computer will be in its own workgroup (as seen in My Network Places). To simplify the view of the computers on the network, it’s easier to assign them to a single workgroup.
It’s easiest to set up a workgroup while you’re setting up your network. If you’re setting up a network with Microsoft Broadband Networking products, the process is particularly easy; the Microsoft Broadband Networking Setup Wizard has screens that guide you through the process of establishing and joining a workgroup.
General setup tips Here are some additional points to keep in mind as you set up your workgroup:
- If you are running Windows XP or Windows 2000 operating system, you must have administrative privileges on your computer before you can set up or join a workgroup. For more information, see Windows Help.
- If you established a workgroup previously during the setup of a computer on your network, you may now be setting up new network devices with a floppy disk of network settings from that computer. In this case, the workgroup name should appear on the workgroup naming page in every new network setup. If it does not, type it in.
- If you are setting up a wireless network by using Microsoft Broadband Networking products, and there is no existing workgroup name, the Setup Wizard will display as your workgroup name the wireless network name (the Service Set Identifier or SSID). Although the workgroup and network are not the same thing, they can use the same name for convenience. You can also type in a different name. As you add other computers to the workgroup, be sure that each one uses the same workgroup name.
- If you already named your computer and workgroup during a previous file and printer sharing setup in Windows, those computer and workgroup names should appear on the appropriate Setup Wizard pages. You can either keep those names or enter new ones. Make sure that all of the other computers in your workgroup have unique computer names and use the same workgroup name.
- If you have not previously set up a workgroup name or wireless network name, the default workgroup name, MSHOME, appears on the workgroup naming page. You can use this name for your workgroup, or you can type in a new name.
Adding a computer to your workgroup
After your network and workgroup are set up, you can add computers to the workgroup. The procedure varies slightly for different Microsoft Windows operating systems. Be sure to enter the same workgroup names on all computers you are adding to the workgroup, so that they appear together in My Network Places.
Important If you have a computer that is already a member of a domain, do not assign the computer to your workgroup without first consulting the system administrator who oversees your domain. For example, if you have a laptop that is a member of a domain at work, do not assign it to a workgroup at home without seeking advice. If you remove the computer’s domain membership, you could experience problems when you try to reconnect it to the domain at work.
Here are procedures for adding computers to a workgroup.
To specify a computer’s workgroup in Windows XP operating system
- Click Start, click Control Panel, and then double-click System. If you don’t see a System icon, click Performance and Maintenance, and then click System.
- Click the Computer Name tab.
- Click Change, and then in the Workgroup box, enter the name of the workgroup you want to join.
If you want to rename your computer so that it’s easily recognizable among the other computer names in My Network Places, enter a new name in theComputer description box. However, be aware that some Internet connections require a specific computer name. If your Internet service provider (ISP) has assigned you a computer name to use, do not change it.
To specify a computer’s workgroup in Windows 2000 operating system
- Click Start, click Control Panel, and then double-click System.
- Click the Network Identification tab.
- Click Properties, and then in the Workgroup box, enter the name of the workgroup you want to join.
If you want to rename your computer so that it’s easily recognizable among the other computer names in My Network Places, enter a new name in theComputer name box. However, be aware that some Internet connections require a specific computer name. If your Internet service provider (ISP) has assigned you a computer name to use, do not change it.
To specify a computer’s workgroup in Windows Me or Windows 98 operating system
- Click Start, point to Settings, and then click Control Panel.
- Double-click Network, and then click the Identification tab.
- In the Workgroup box, enter the name of the workgroup you want to join.
If you want to rename your computer so that it’s easily recognizable among the other computer names in My Network Places, enter a new name. However, be aware that some Internet connections require a specific computer name. If your Internet service provider (ISP) has assigned you a computer name to use, do not change it.
Workgroup and computer naming conventions
When you create names for your workgroup or computer it’s important to note some specific naming conventions.
Workgroup names A workgroup name must:
- Be the same for all computers in the workgroup
- Be different from any computer name in the workgroup
- Usually be fewer than 16 characters
- Usually not contain any of the following characters: ; : " < > * + = \ | ? ,
Computer names A computer name must:
- Be unique in the workgroup (no other computer in the workgroup can have the same name)
- Be different from the workgroup name
- Usually be less than 16 characters
- Usually not contain any of these characters: ; : " < > * + = \ | ? ,
- Under some circumstances, be all uppercase
Do you need a logo design for your business? Why not try a logo maker . List your Website in this Great Directory online-marketing
Using a workgroup
After you have established your workgroup and computer names, you can set up file sharing among the files, folders, and printers in your workgroup. For more information and instructions for file and printer sharing, see Set Up File Sharing and Set Up Print Sharing.
To be able to access your workgroup and its shared resources, you must be logged on to the network. In Windows XP and 2000, this happens automatically when you log on to your computer. In Windows Me and Windows 98, you must log on to the network separately when you start up your computer. You can set an optional password for network access.
source